Showing posts with label rhinestones. Show all posts

Thursday, June 27, 2013

Born Pretty Review - Nail Art Studs

Hello hello!

I have a fun review today of some Nail Art Studs from Born Pretty Store !

I chose some super cute metallic nail art studs that can be found here and here!


The studs arrived within the expected shipping time, and the wheel contents hadn't shifted.  I like these wheels because they are harder to turn and open than some other wheels I've had, so I don't get a big mess in my nail art drawer or when I go to move a wheel. One of the wheels had mostly larger studs in a variety of shapes and sizes and the other containes a variety of smaller ones.  I did 2 manicures that combine nail art stamping with an accent stud and one manicure with just an accent nail.  I have several more ideas for how to try these, but I thought I would share what I have with you now!

On to the nail art!

The first manicure was using Cheeky XL plate B and some medium sized gold square studs.  The base was Finger Paints Go Van Gogh.  Barielle Mint Ice Cream Cone for the stamp.


The second manicure used an image from XL plate using a base of LA Colors Rain Drops and sponge gradient China Glaze Avalanche and L'Oreal Luminescence.  Stamped using Sally Hansen Chrome Crystal and topped with a large silver coloured square stud.

The last manicure, and what I am currently sporting is 1 coat OPI Off with Her Red and 2 coats Pirate Polish Five by Five (AWESOME polish by an equally awesome brand--I'll be reviewing this very soon) and an accent nail that used one of the tiniest gold dots and a large gold grommet type stud as well as some red rhinestones from my stash. I really like how this addition dresses up the manicure.  It's just plain GOOD to have hot red on my nails but the little added bling makes me feel fancy!


I am really enjoying playing with these rhinestones and can't wait to try more!

I want to say thank you to Born Pretty Store for sending me these items to review, and thank all of you for popping by to take a peek!

If you go shopping at Born Pretty Store, remember you can get a 10% discount by entering the coupon code!


What would you do/have you done with studs? Leave a link! I'd love to check it out!  Please no spam.
Happy polishing!

JQ

Sunday, September 4, 2011

Fish Nets, Pink Skullies and a Guest Mani!

FISH NETS:


2 coast Essie Lacquered Up and stamped using Gosh Nero and Sally Hansen Chrome Sizzlin' Gold with image plates bm-209 and bm04. One red rhinestone for the fish's eye and a coat of Seche Vite.


If I remember correctly the fish caught in the fishnets was at the behest of my friend Naomi. :) She's got a whimsical side.


PINK SKULLIES:


2 coats of Revlon Orchid and--forgive me--I don't remember for sure, but I think it was Sally Hansen HD Digital to achieve the pink on pink skully action (bm-211). Then I went over the skull on my ring finger using OPI My Private Jet. One coat Seche Vite.


GUEST MANI:


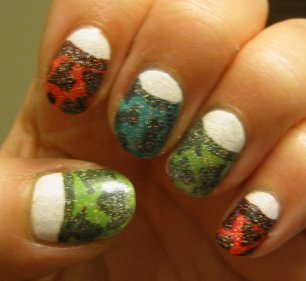
My friend Naomi came all the way down from the Yukon last month just to visit Moi! I felt so special! ♥ ♥ ♥ ♥ ♥ ...sooo we painted her nails in skittles with polishes that matched the colours in her camouflage pants. Then we tied them all together using pink retro flowers made with dotting tools and a toothpick.


Again, forgive me, but I don't remember FOR SURE. I'm pretty sure the thumb=Essie Little Brown Dress, pointer=Joe Moss, middle=Essie Sew Psyched, ring=franken pale green, pinkie=franken ivory. I think the flowers were Revlon Orchid and a franken lighter pink. I then meticulously placed five or six bullion beads in the center of each flower and sealed everything with a coat of Seche Vite. It was fun spoiling her with a really time consuming manicure. The results were awesome.

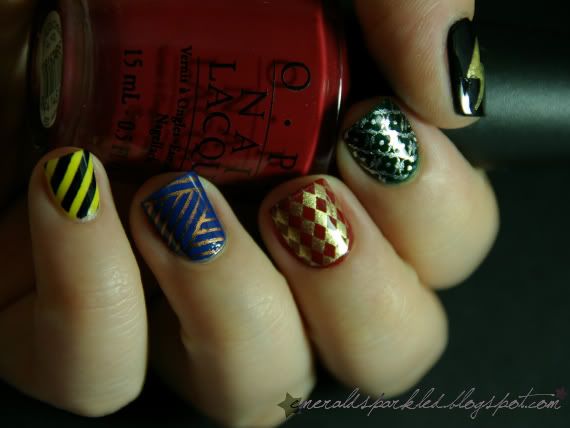
We also did a Harry Potter manicure for her the last day she was here, because she was on her way to Vancouver to watch HP and the Deathly Hollows part 2 with some friends...but alas I forgot to get a photo. It was inspired by this manicure by Emerald Sparkled. She makes AWESOME manicures ALL the time. Check her stuff out!

Thanks for stopping by! Sorry it's been so long since my last post!

JQ

Saturday, February 19, 2011

Spring Bling

Hello jellos!

Anybody else wishing for spring? Well it already sprung on my nails. :P

I just want to begin by sending out mad props to Ainos at Glammed-Up for all her deliciously layered manicures. They remind me of those intricately hand painted silks I saw when I was in the fibre department of my art school. She's really inspired me to look at every polish for stamping purposes, to layer stamps and polishes and to try for partial stamping too! This is my first purposefully layered manicure. Not ONE special stamping polish was used!


I started with a base coat of Seche Clear, then one coat of Sally Hansen Insta Dri Lickety-Split Lime. When that was dry I sponged on three layers of OPI Green-Wich Village three quarters of the way up my nail, then a few layers of Sinful Colors Show Me The Way just at the tips.


My next step was to stamp a leaf pattern horizontally across each nail at about the halfway mark. To do this I used Revlon Matte Suede Emerald City and Bundle Monster image plate BM11 (the outline leaf rather than the solid leaf pattern). I was pleasantly surprised at how the stamp showed up, plus I was excited because I knew that matte polishes have a subtle glimmer after top coat is applied so I knew it would be purdy. :P


I then used GOSH Metallic Green and BM10 to stamp a random spray of little flowers. It also hinted at a dewy sparkle.


After that step I thought I failed my nail. I used GOSH Metallic Purple and BM06 to stamp the Dalia-esque flower. There wasn't very much contrast at all and it just looked like a light metallic pink blob on top of all that work! But I have seen stamping done over top of smudges of color-especially with flowers-before so I hurriedly chose the Revlon Matte Suede Ruby Ribbon and stamped on the flower image from BM03 over top. SAVED! And it looked prettier than I could have hoped!


I only placed the pink flowers on every second nail, then I placed rhinestone stars in the center of every pink flower, and a flower rhinestone coupled with a tiny round rhinestone on the other four remaining nails just to even out the sparkle.


Come on Springtime! :D
Thanks again for stopping by. I can't believe how my list of friends has grown and I thank you all for you support and comments! I want to say that I am on a hunt for GOSH Holographic and if I find some I'll buy two! One for me and one for my giveaway! Still working on that puppy.


JQ

Friday, December 17, 2010

Poinsettias with Rhinestones

Hello Jellos! I'm back before the holidays with another mani that I did yesterday.

I filed down my nails and squared them off again and I remembered how much I love them like this. Sure there's not much space but I can get through the days without chipping/breaking a nail and they look fairly cute.

I probably should have used bullion beads again because I was going for the poinsettia look, but I was staring forlornly at my rhinestone wheel wanting to use them so I caved. You can't really tell in the photos but the ring finger is actually darker green rhinestones.


I used 2 coats of Claire's Snow Ball for the base colour, then stamped using image plate # BM06 and Wet n' Wild Precious Metals Red Graphite. Then rhinestones and a topcoat!


My rhinestones didn't last much longer than a day before a few came off and I obsessively picked the rest off. *sigh* I have this love/hate thing going on. But I used a dotting tool and some emerald green polish to fill in the centers this morning and that got me through the day.

I just went out and picked up three new Konad stamping polishes in Yellow, Apple Green and Chocolate and I CAN'T wait to use them. I also caved and picked up Sally Hansen X-Treme Wear Rockstar Pink along with another Wet N' Wild French White Creme (base white and black are so essential for me). Eee!

Again Merry Christmas and if I have my way I'll be posting another manicure tomorrow afternoon!
<3
JQ

Sunday, November 7, 2010

Rock n' roll Nail Art


Ooops I missed a challenge deadline! That's okay I had tons of fun with this manicure. Who doesn't love playing with pink and black and SPARKLES? :P

The other entries for Lacquerista's Rock n' Roll challenge are pretty awesome. If you have a minute you could go take a peek and vote!


Thanks for stopping by. I'll try and get better photos of this manicure in tomorrow's light and update. Providing it survives another night of weaving!

Cheers,
JQ

Friday, November 5, 2010

Black and Red Reverse French

With rhinestones! :P


Base - Essie Lacquered Up 2 coats
Tips - Claire's Black Hole 1 coat
Detail - Kiss Nail Art striper polish in white plus Claire's Snow Ball with dotting tool for flower and a dot on each tip. I used the toothpick technique to draw down the petals. I finished off with red rhinestones.
Top Coat - Sally Hansen Insta-Dri Anti-Chip


Thanks for stopping by. And thank you for all your comments!
Later gaters!
JQ

Tuesday, October 26, 2010

Let's Rock With Numbers Entry

Greetings Jellybeans!

Well this month seems to be filled with manicures for challenges and competitions. It's been a lot of fun! Here is my entry for Parokeet's Let's Rock With Numbers challenge (for the Essence goodies).

I always find that any time I use rhinestones for my mani I spend so much time just running my fingertips over the bumps and eventually I just pick them right off. I thought it would be neat to do a rhinestone manicure based on the numbers 0-9 (the same as letters a-j) in the braille alphabet.


I used Claire's Snow Ball and Balck Hole for the base colours. Then I used my dotting tool to make six large dots in opposite colours on each nail. With a smaller tool I placed dots the same colour as the base on the "empty" braille spaces, then used rhinestones in the opposite colour as the base to create the raised braille.

Topcoat and voila!

I spent so much time running my fingertips over these. For the first time I could actually handle the sensation of all the rhinestones because they had a purpose. :) I didn't pick any off.

If you want to check out the other entries and possibly vote (There's a bit of a process involved. If you scroll down past the photo entries there's a link to the instructions) please click here!

Thanks again for stopping by. And thank you everyone for all the comments you leave. I've been trying to respond to each one!

Hearts off the charts,
JQ

Friday, October 22, 2010

Mummy Manicure

EDIT! Please everyone, I had to come back here and let your know that I have unintentionally duplicated (or very nearly) a mani already done by PimpMyNailz I had been daydreaming about making this mani for awhile, but had no idea if it had been done before. I did Google it in case I might spot another mani, but I didn't get too thorough. Then I went ahead and submitted it to Chez-Delaney. I had also made a submission of a different mani to Polish Freshie's competition, but when I went in to check out her gallery there I found PimpMyNailz's awesome Mummy mani. She definitely made this mani first. PROPS. Great minds think alike for sure!

Actually it was one of several halloween manis I had been considering to submit for Freshie's challenge. I am soso glad I didn't! This way PimpMyNailz can showcase hers without mine being all like 'hey mine's the same-ish. neener neener'.

I wish everyone in both competitions best of luck, and I hope no hard feelings are had.

<3 <3


Below is my original post.


---------------------------------------


Greetings Ghoulies! In celebration of my new forays into Halloween with my son, here is my mummy mani:


This is my entry for Chez-Delaney's Halloween nail Stamp Art Competition. For more info click here. The stipulation is that you have to use stamp art for your manicure.

I used three coats of Claire's Snow Ball for the base colour, then stamped the design with Konad Special Polish Black Pearl and Konad Plate #S6. The first time I saw that image I thought "mummy wrappers!" With Kiss Nail Art black I blacked out a stripe using the stamped lines as guides. I then placed two red rhinestone eyes on each mummy face.

Topcoat and that's all!

The contest runs until Oct 31st and the prize is one of those really large image plates. Go check it out! There are so many neat manicures posted in the gallery.

Later gaters!
JQ

Thursday, September 23, 2010

Dollarama/Michaels Haul and a Mani of Course! (PICS!)

I got everything in the below except the dotting tool and the polymer clay at one of the local Dollaramas. A buck a piece! Pretty good deal. :) (all prices are CAD):


The dotting tool was a $2.50 purchase at Michaels. Oh Michaels! How I wish I was full of dough so I could buy more of the WAY COOL stuff in your scrapbook/card making section and use it all for my nails. :P The stickers are fairly small and sticky, so I'm hopeful that they will work, especially the ones that don't have a lot of fine pointy bits. Oh well for a dollar each these two sheets were worth it just to try.


The polymer was the cheaper variety from Michaels as well. I am very curious about these Fimo logs and since I love a crafty project I want to start making my own unique ones. If I can generate enough interest I might even sell some (OR have a giveaway of my very own?), although Bundle Monster has a pretty sweet deal on them. :D


And these groovy little sticky rhinestone sets are probably meant for scrapbooking or something, but I think I could use them on my nails. They provide a bit of variation in size so I can combine them with the stones in the wheels I bought. They are on sale at Michaels for I think $1.50 but I was glad I passed them up, because I found them for 1$ a piece at Dollarama, and there were like a bazillion colours, plus several colours of pearls which you can see to the right. I only got two neutral ones. I made a real mess going through the rack! :P But I'm a tidy gal. I cleaned it all up.


last but not least I got a few more wheels for a dollar each. I can't tell ya how much I am in love with that store right now! OOOh RETAIL THERAPY !


Phew!

FINALLY time for the mani.

I was inspired by Blue Tape and Nail Tips' ND6: Shooting Star (I just found her blog recently and I like it there!) so this was my mani project from a few days ago:


I used two coats of an olive green franken that has a wee bit of gold shimmer in it for the base. I didn't use tape as I wanted my shooting star tails to curve around my tips. It was a good excuse to break out the Art Deco and play. :)

I outlined where I wanted the tail of the shooting star to curve in the Art Deco fuchsia sparkle, then filled it in using my Sally Hansen X-Treme Wear Strobe Light. I finished it off with an iridescent star sticker (from above haul. Worked quite well, although I had a bit of trouble getting all the little tippie-bits to stick down) and a couple coats of Seche Vite.


Thanks Blue Tape & nail Tips for a lovely inspiration. Her Shooting stars are pretty full of awesome so you should definitely check them out!

Okay Okay I'm signing off! I'll be posting today's mani plus a pic of my first polymer clay project-- citrus fimo logs--either tonight or tomorrow morning!

Thank you all so much for popping by! I scrolled down and realized that I have 29 followers already! WOW! Thanks for all the support. <3 <3

Hugs,
JQ!

Friday, September 17, 2010

Jealous Hearts (Spats n' Spangles variation)

Happy Friday everybody!

I really loved my Neon Spats n' Spangles mani, so I thought I'd do another version of it last night using my Sally Hansen X-treme Wear greens.

I like this striped tips mani better on my square nails, but it still looks pretty. The first one is my left hand and the second shot is my right. For the first time I actually had equal success with both hands. I think I am beginning to feel more comfortable with the striper brushes.


I used Wet n' wild French White Creme for the base, then painted 3/4 of the nail with alternating Sally Hansen greens. The dark one is called "Going Green" and the lighter one is called "Green with Envy". Pinstripes and -I'm going to call it the smile line but plse correct me if I'm mis-using it- were accomplished using Art Deco black striper polish. I used a bundle monster stamp for the hearts using Konad special polish in Black Pearl.

Again with the blurry! I'm convinced I'm missing something with this little camera.


Rhinestones in two different greens (light on the dark and vice versa) complete the Spats n' Spangles effect! Topcoat and Voila. Jealous Hearts. :)

Hope everyone has a terrific weekend despite the fact that fall is closing in. Hey. Winter isn't all bad. At least not until January. :P

Cheers!
<3
JQ

Tuesday, September 14, 2010

Sparkly Spacegirl & Alice in Wonderland Manis

A long time ago in a disco far far away...

I have been falling in cosmic love with all the dark polishes layered with sparkle I've been seeing. Especially those with holo-glitter. I'm lusting after polishes like NfuOh GS-14. Here's what I did last night. Please forgive me once again for the blurry photos! My camera and I are on the rocks again.

I painted my nails with Wet n' Wild Black Creme, then painted on triangles of Sally Hansen Chrome in Sizzlin' Roze at my cuticles. I outline the triangles with my Art Deco sparkly fuchsia striper.


Added a few fuchsia triangle rhinestones at the cuticle for added glam.


And went in for the kill with my Sally Hansen X-Treme Wear Strobe Light.


Topcoat and Voila! Disco Space Girl nails. :)


Onto the nail fail...

These are an attempt at Tim Burton's Alice in Wonderland nails. Each nail has a bit from the backgrounds of the posters. Red hearts for the Queen, green top hats for the Mad Hatter, and blue keyholes for Alice.

HOWEVER. After all that work brushing on the craft paints (especially when it came to painting my right hand) I went ahead and ruined it with a sparkle topcoat! Without taking a few pics first! AGH! I have learned my lesson!


I used 2 coats of Wet n' Wild French White Creme for the base colour, then played with the craft paint.

These didn't sty on last night. I took a few quick pictures under the yellow light and then cried "Off with their heads!"


Cheers!
JQ

Monday, September 13, 2010

Art Deco Mani

This manicure was inspired by the first image. I associate teals with that style. :P I did use craft paint for the teal, but you could do this mani equally as easy with polish. I'm just on a mission to experiment with the craft paint as much as possible.

Anyways onto the pictures. There are a few of them!


Base color Wet n' Wild French White Creme
Craft paint for the teal half moons
Kiss white striper polish for the line work on top of the half moon.
Emerald green rhinestones.
Sally Hansen X-Treme Wear Going Green along the outside of each teal half moon.


My best nail is my left thumb of course! There's more room and I'm painting with the right hand.


Okay that's all for today. I'm not sure what's next on my list. I have a few ideas bubbling. :P

Cheers!
JQ

Wednesday, September 8, 2010

Neon Spats N' Spangles Mani...

After my pretty peach mani I just had the urge to BUST OUT with some colours. So I had fun with my new Art Deco striper polishes!

I got a haul of them from a small town bargain store. :) Fuchsia, yellow and lime green for this mani. I also got a royal blue sparkle and a fuchsia sparkle, but I'll save those for another day.


I painted my nails with 2 coats of Wet N Wild French White Creme, then striped on the colours, finishing with black across the...smile?


I then stamped some different sizes of stars on my nail using Konad special polish in Black Pearl and various Bundle Monster plates. Sorry this next one is a bit blurry. :(


I found rhinestones to match the tip of each nail and placed a corresponding one in each of the larger stars (one per nail). Then I did little rows of rhinestone "spat" buttons up the side of each tip, following one of the colour stripes.


A good top coat and voila! My Neon Spats n' Spangles mani.

Hope you like!
Cheers!
JQ

Saturday, September 4, 2010

Show a little skin...

My fingertips are pulling on their lacies...


This is a peachy franken I made with like a billion mostly used up old nail polishes. Seriously the mutt of polishes. In fact. I dub it Mutt. :D

I then used Konad special polish in White and BM#16 to make the stamp. I stamped diagonally across the each nail because although they seem to be meant to cover the whole nail the Bundle Monster images are a fair bit smaller than the Konad ones, which are still practically too small for my big fat nails! :)


I took my new Kiss white striper polish and drew the lines across where the pattern meets the solid polish. I Randomly placed a clear rhinestone on each nail and finished with a top coat! Voila!


Hope everyone is having a splendiferous labor day weekend. :)

<3 JQ