Showing posts with label Sally Hansen. Show all posts

Monday, April 7, 2014

Franken Sheers & Splatter Stamp

The 80's have taken up residence on my nails this week.  I have no words for how happy this manicure makes me.  Personally, I feel like I haven't rocked a manicure this gnarly in a long time.  It's SO mondo.


I was totally inspired by  Punky Polish's phenomenal Watercolor Sugar Skulls manicure.  If you haven't already, you NEED to see it.  When I read that she made her own sheer tint polishes for this, I couldn't even contain my excitement.  I ran over to my stash and started yanking out jellies and a practically unused 2.5oz bottle of Beauty Secrets Hardener High Gloss Top Coat.  I poured some of it into five empty bottles that I had stashed in the back of the cabinet and then sent in a few drops of pink, royal blue, purple, green and yellow jelly-ish polishes.  It felt great to make that bottle of topcoat useful, since I never really liked it for topcoat.  I read somewhere that it does well as base coat, so I'll try that with the half bottle I have left.  

The results of my franken frenzy (pictures are clickable):


I hear that the OPI Sheer Tints have a really honey-like consistency.  These are really quite runny, but the effect was exciting.  I made my tints tintier than the OPI, purely because I couldn't believe that the pale cloudy solutions in the bottles would do a tinty enough job.  Turns out a little would have gone a long way, but I still REALLY like the result.  I don't mind that the final product isn't quite a sheer as the OPI.  I had the presence of mind to snap a picture before a splatter stamp leapt onto my nails :


I began with two coats of white creme.  I dabbed on the pink and purple corners first, then the blue and green corners and finished with yellow int he center.  The colours hadn't dried quite yet so they pooled together in acid-swirls and "moved" each other around just like watercolour!  SO HAPPY!


This is a snippet of my scrap paper.  I use white printer paper and paint on a bunch of colours and then stamp over with a bunch of different colours to see what I get.  Sometimes I will cover entire sheets with this.  I have even gone so far as to label a few.  Lower right:  I was trying to decide if I wanted to use the ampersands (BM-311) or the splatter (BM-416).  The competition was tight.  They are two of my favorite Bundle Monster images.

2 coats Pure Ice Superstar!
Dabs of all five franken sheers
Stamp: BM 416 Splatter and SH Hard as Nails Black Heart 
Seche Vite

The splatter won out by a smidge.  Can you see how the yellow overlapped with that pretty pink to make a peachy coral color?  ♥ ♥ ♥ ♥

Just for the record?  I still REALLY REALLY want to get my hands on the OPI Sheer Tints, because I think I will get an insane amount use out of them.  Check out Phoenix Beauty Lounge for some amazing ways you can use them!  

Thanks for peeking!
♥
JQ


Thursday, March 6, 2014

Fun with Layered Stamps!

JELLYBEANS!

It's been a long time. Is there anybody still out there?
I made pretties!

Layered Bundle Monster stamps! 


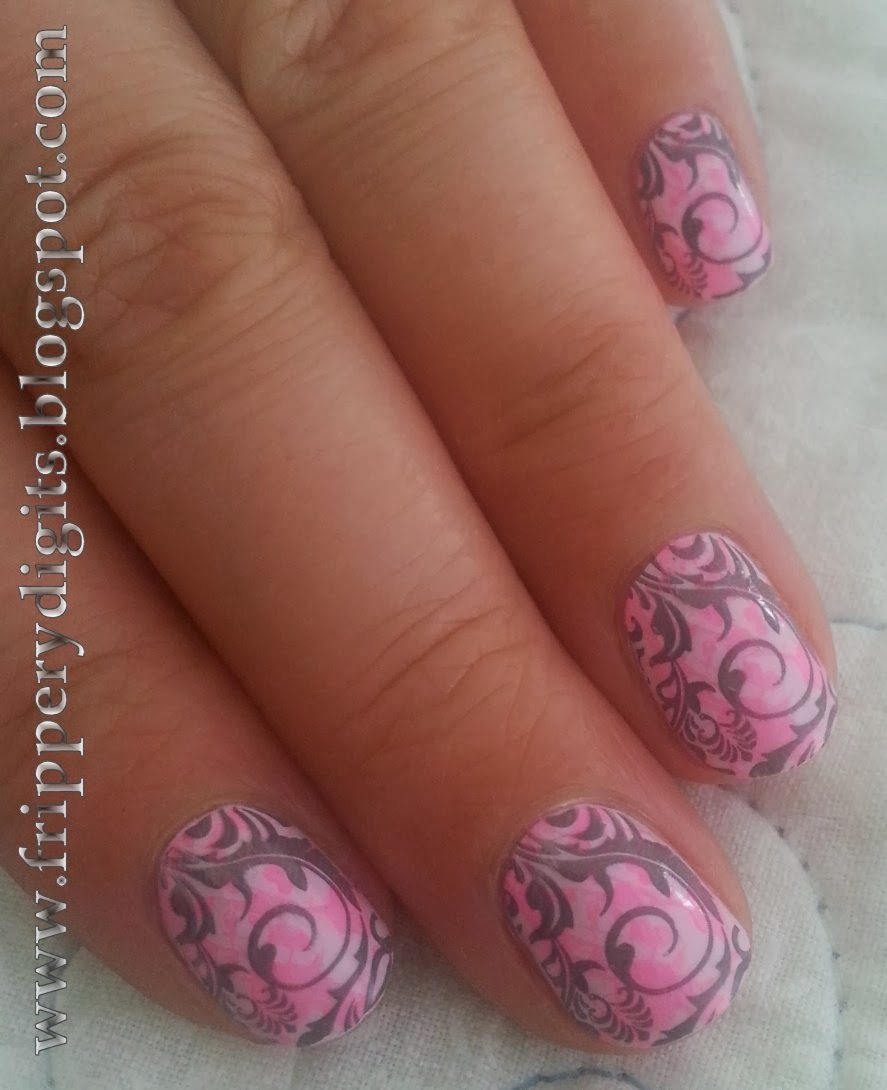
2 coats pastel pink franken 
+ (LAC untitled neon pink + BM-416 Splatter)
+(Frankened grey + BM-017 Filigree)
+SH Insta-Dri Top Coat
= 1 Badass Mani

 The pink splatter is much brighter IRL, but I couldn't get my camera to capture it! 


And my new friend Aimee came over today for a play date --the kids played too.  ;p
I got to paint her nails with a pretty design and she said I could show it off here as well!   I am looking forward to many more nail art afternoons with her!


2 coats Billie Cosmetics white creme 
+ (China Glaze Sun Worshipper + BM-416 Splatter) 
+ (Frankened grey + Cheeky XL B Rings)
+SH Insta-Dri Top Coat
= 1 Badass Mani

I love Bundle Monster.  I used a plate from the CYO 2013 set and one of my all time faves from the newly revised original set. Both manicures were over stamped using a frankened charcoal grey.  I think I used a bottle of SH Insta-Dri Whirlwind White with several drops of Claire's Black Hole.  I don't remember what I did to make the pink franken. 

I'M SO EXCITED! Did you hear Bundle Monster is having another CYO nail plate competition? You can submit up to ten images that you would like to see on an image plate and see if any make the cut! 5 of my images were selected for the 2013 set!  I can't wait to try again this year!

Happy Painting!
♥
JQ


Wednesday, September 4, 2013

I RAINBOW SPARKLY HEART BUNDLE MONSTER

 l

 A brightly sprightly adventure in blended stamping!


Base: Seche Clear
Main: 2 coats LA COLORS unnamed grey
Stamp Colors: Art Club (striping polishes) pink, orange, yellow and blue, Kleancolor Neon Green
Image: BM317
Sparkle: SH Xtreme wear Disco Ball
TOP: Seche Vite


 I am SO excited to see the new Bundle Monster collection, which is being revealed a few plates at a time.  You can follow along Here!
I can't beleive at least one of the designs I submitted was selected to become a part of this collection!  I am totally in love with what has already been revealed.


Thanks for peeking!
♥
JQ

Tuesday, September 3, 2013

Neon green with Bundle Monster Stars


For this manicure:

Base: Seche Clear
Main: 3 coats LA COLORS unknown neon green
Zig zag stamp: BM 201, SH Insta-Dri Lickety-Split Lime
Star stamp: BM05, Kleancolor Metallic Black
Accent: Kleancolor Metallic Green
Top: Seche Vite

AND!!!!


Woohoo!  Congratulations to all the other winners.  You can see the list Here!  I can't wait to see all our designs in this collection! 

♥
JQ


Friday, March 8, 2013

TGIF Rainbow Gradient


 OMGRAINBOWSPARKLYGOODNESS!!!!!


It is SO obvious that my cuticles just plain angry with me, and on top of that, the blue stained them, but I couldn't NOT post this manicure win. This one makes my heart go boom every time I look at it.  And the shimmer adds a real kick that I couldn't capture completely in the photos.  
DRIVING HAZARD. 
I wish I was more pro-star at the care and maintenance of my hands.  I have taken to using cuticle oil morning and night so see if that helps.  So far no flare ups with this Orly Argan Cuticle Oil!


Base: Revlon Quick Dry Base Coat
White underlay: 1 coat Sally Hansen Xtreme Wear White On.
Sponge (cuticle to tip): duri cosmetics Kinky Pleasures,SH Xtreme Wear Going Green, SH Insta-Dri Lightening, SH Xtreme Wear Sun Kissed, Essie Lacquered Up
Stamp:SH Hard as Nails Black Heart
Plate: Cheeky XL B
Sparkle: SH Diamond Strength  Diamonds
Top: Seche Vite

Thanks so much for stopping by!  I hope everybody has a fantastic weekend!  
♥ ♥ ♥ ♥ ♥
JQ


Monday, March 4, 2013

NOTD: Barielle Mint Ice Cream Cone and Nail Art


For this manicure I used a base of Seche Clear, and 2 coats Barielle Mint Ice Cream Cone, then a wide stripe of Sally Hansen X-treme Wear Sun Kissed and a thinner stripe of Essie Little Brown Dress, then once it was dry I masked off all but a thin strip of brown and stamped using BM 214 And GOSH Metallic green.  Topcoat: Seche Vite.


I aimed so that one stripe of the full nail design transferred onto the brown.  Definitely more successful on my left hand.  My right looks smudgy! 

My camera doesn't do yellow tones well, so this is not an accurate representation of Barielle MICC.  These look a bit washed out, to be honest.
 
Thanks for checking out my blog!  Happy painting!

♥
 JQ

Thursday, February 28, 2013

Cheeky Rainbow Skittles


 Yes, I stayed up WAY past my bedtime.  For a rainbow XL stamping frenzy! Photos taken  in a hurry the morning after I did this because we were driving into the city and I had a feeling I would ding them up while we were gone.  And I DID.  Badly.  L.A. COLORS BASE/TOP, you make me sad.


 Base L.A. COLORS BASE/TOP

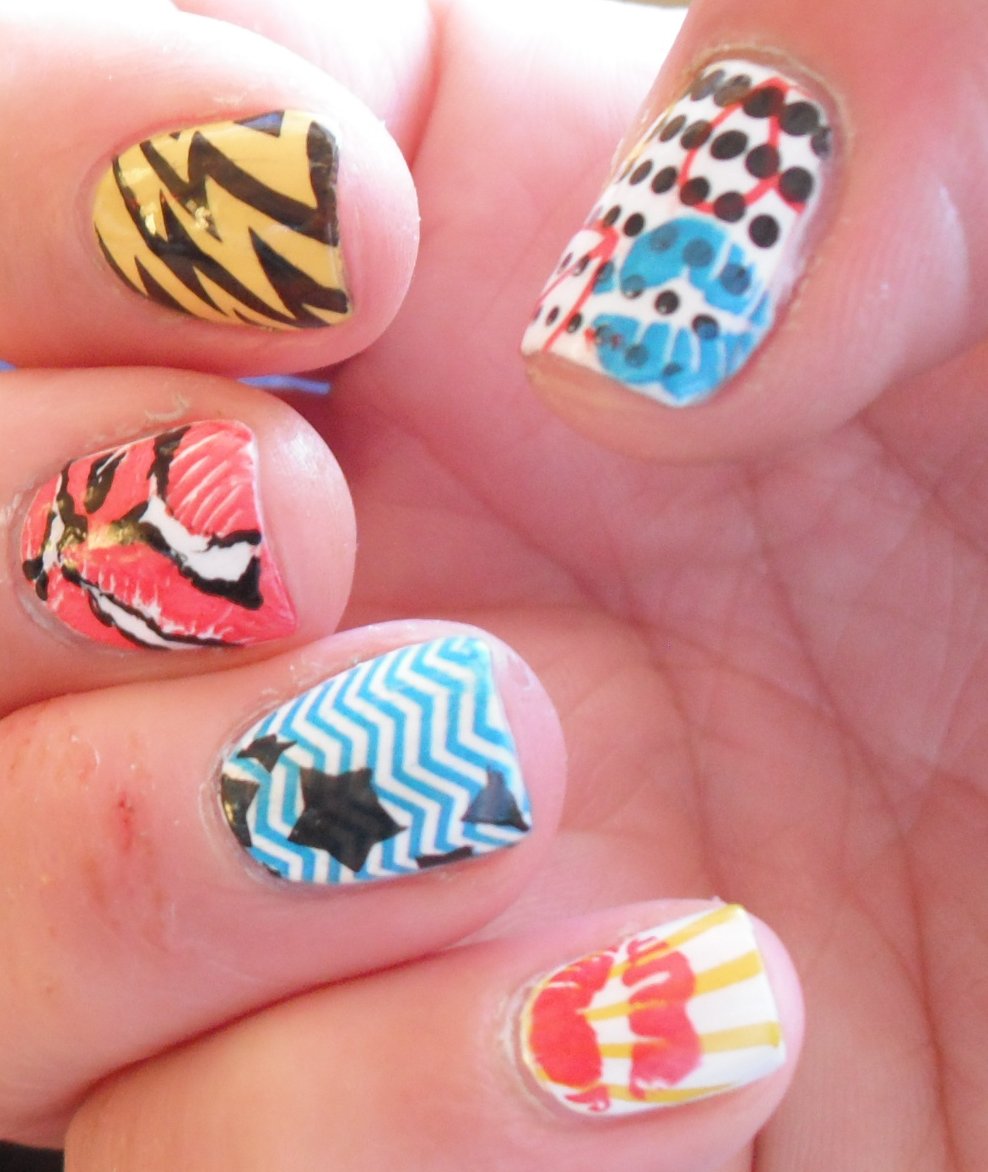
Colors: OPI Pamplona Purple, SH X-Treme Wear Sun Kissed, OPI Green-Wich Village, OPI Off With Her Red!, SH Complete Salon Manicure Thinking of Blue, Nina Ultra Pro Like Butta

Stamp: SH Hard as Nails Black Heart

Plates: Cheeky XL plates A, B, D

Top: Seche Vite.


I wanted to play with all the different images, and had done a similar manicure with BM plates on my friend Jenna a few Christmases back, because we couldn't decide on just one.  My favorite is the pebbles on my pointer finger on the above image.  That was my instinctive choice for a full mani, and now I know I could have gone with it. Personally, I think it is the most successful combo.

 Glad I took these before I left, even though I wish I'd been able to get better shots.  The first image (flash) is actually quite nice and gives a good idea of how it looked overall, but it really made me shiny.

I LOVE MY NEW PLATES!   

Happy painting y'all!

 ♥
JQ


Thursday, February 21, 2013

Cheeky Image Plate Review

GUYS. I got some seriously CHEEKY mail a week and a half ago. ;p

I splurged and ordered these fabulous rectangular nail plates from Cheeky.  AND THEY ARE SO BADASS.

I am a Bundle Monster gal.  I have 6 Konad plates from when I first started and the rest are all BM. I LOVE THEM. 

But a good friend and fellow nail head let me in on the fact that you could get these other image plates through amazon.ca  And that they had pretty much a whole plate full of PAISLEY. I got 8 plates. The price has even gone down slightly from when I bought these, but my order averaged to less than 10$/plate, which I think is pretty reasonable.  I did the math, counting all the images over 8 Cheeky plates. There are 563.  In the 3 BM sets there are 440. I also took the average images per BM set.  (140, 150, 150) which is about 146.5.  Then divided the number of images in the Cheeky set by 145.5 to see how many BM sets it is the equivalent to. 3.84.  Anyways.  I'm not a math wiz by any stretch, but that was enough to tell me I got a pretty decent deal. SO. PICTURES.


The packaging was great.  Inside the bubble wrap lined envelope, each plate had a little sleeve of bubble wrap.  I got a cute little card congratulating me.  It's a party!  A nail art party! 


They all had that nice protective blue film that just peels away, and a really cool touch is that each plate is backed with pink plastic and it extends beyond the plate, so it gives a really nice finish, while keeping your paws, the table, and the other plates from getting scratched.


Shiney!


Another thing I really appreciate is the size of the full nail images.  They are nice and big! Big enough that I can select the area to paint and transfer to the nail. Every full nail image has one concave edge that makes them very versatile;  It eliminates the need to have separate images for french tips, and gives me the option for a moon manicure effect as well.I have decent sized fingernails, and I really dislike trying to double stamp.  It's so hard to get a good seam. 

For reference here is a picture of the large Cheeky images next to a larger BM image and the original BM full nail image:


I also like that a lot of the images have reflections so you can stamp the other paw, or mess around with mirroring.


Not only do they do reflections, but also a few different sizes of the same image.  So you can do that darn pinky finger the same as the others, or give the thumb a big one.  :)


 Thanks Cheeky!


I'm a fan!


Here are a few pics of the manicures I have done so far:


The very first one was the celtic image.  I absolutely HAD to find out what that looked like.
Base: China Glaze Concrete Catwalk 
Stamp: GOSH Metallic Green.  
Plate: Cheeky D
Top: Seche Vite


Manicure #2 kinda reminded me of circuit boards.
Base: Finger Paints Go Van Gogh
Stamp: Essie Good as Gold
Plate: Cheeky B
Top: SV


 Manicure #3 was subtle. I only got a quick shot in the evening, but irl it looked way prettier.
Base: Sally Hansen CSM: Wet Clay
Stamp: Billie Cosmetics Reign
Plate: Cheeky B
Top: SV


Currently!

Base: Sponge gradient OPI Off With Her Red, CR #89, Billie Cosmetics Orange
Stamp: Sally Hansen Hard as Nails Black Heart
Plate: Cheeky A
  Top: SV


Thank you so much for popping by!  Happy painting!

♥
JQ

Thursday, February 7, 2013

Acid Butterfly


Greeting fellow nail geniuses!

I was inspired by Dressed Up Digits'  rainbow water marble, which came from the tutorial by the incredibly talented and marvelous ProfessionalDQ and this manicure  by Chokoreto to produce my own version, which I have dubbed The Acid Butterfly. 


I have had oodles of trouble with water marbles in the past, but this one worked awesome!  I made sure to use filtered water that was room temperature, and the sheers were pretty runny which helped when I was making my bulls eye. OR it was pure magical coincidence that I managed this one.  ;p 


Sorrrrry!  My eczema is actually getting better now, but this manicure is from a week ago, and it was still bad then.  I know it's ugly, and the camera makes it uglier than it really is.  I would not have bothered photographing that hand but each nail was unique.

Base: L.A. Colors basecoat/topcoat

1 coat Sally Hansen HD4070-04 Hi-Def

Sponge gradient (moon to tip): 
Sally Hansen HD4070-04 Hi-Def, 
Sally Hansen HD4070-13 Resolution, 
Revlon 340 Ocean

Marble: SH Hard as Nails 4860-28 Black Out,
Finger Paints 806618 Merry Mistletoe

Dots applied after using SH Hard as Nails 300 White On

Topcoat: Seche Vite

I got nail mail yesterday and I am dying to show it off!  Working on the review post for it tonight.  MADE OF WIN.  

And that giveaway IS coming.  It's just that I've been away from the internets awhile.  I'm trying to familiarize myself with rafflecopter. The giveaway is actually getting bigger as time goes on and I find more cool stuff, which is ok...right? :P  

Happy Painting!

♥
JQ


Tuesday, January 22, 2013

POP!


POP!


Hello!!
I used several image plates and polishes for this, and if anyone is curious which ones just drop me a note.
I'm pretty sure the blue and yellow were SH insta-dri, and the red was OPI Off With Her Red. Top Coat was SH Insta-Dri.  
I'm sorry for the up close of my eczema on my right hand.  It hit me pretty hard between the move and the harsh temp/humidity changes we've had this winter.  I'm trying just plain coconut oil on it now.  I've heard it's pretty awesome for eczema, so I'm hopeful it will work for me.

Almost have it all together for my giveaway so please stay tuned!  Thanks for popping by!

♥ ♥ ♥ ♥ ♥ ♥
JQ


Wednesday, January 16, 2013

Sally Hansen Black & White Paisley


Base: SH Extended Wear
Nail (and dots): SH Xtreme Wear "White On"
Stamp (and dots): SH Hard as Nails "Black Heart"
Plate: BM-315
Top: SH Insta-Dri


 I know it's been months and months since I last made a post and this is pretty short and sweet, but I promise I am still a total addict!! My polish stash continues to grow despite all efforts to restrain myself --sometimes they are just toooo pretty!  I collected all 3 BM sets plus that handy case, and I have more image plates arriving by post sometime in early Feb.  Things have been intense here over the past 6 months or so, but now that the dust is settling I hope to be back to fairly regular posting.  Stick around! I'm plotting a giveaway! :D
♥ ♥ ♥
JQ

Monday, March 26, 2012

Blue and White China


Greetings Jelly Beans!

I've seen some blue and white manicures around the internet that remind me SO much of fine china, that I finally decided to give it a shot. I started with 2 coats of Wet n' Wild French White Creme, then stamped using a full nail stamp off #BM-224 and Sally Hansen Thinking of Blue. Finished with a coat of Seche Vite! If you look close on my thumb you'll see the nasty seam I got when I was double stamping. My right thumb turned out better, but I'm having so much trouble taking a non-blurry shot with my good hand I didn't even try to switch it up.


I really enjoy how effective this is! It's fresh and spring-y too! The fiber artist in me also sees reference to those heirloom applique quilts in blue and white.


One more shot in the bright light:


I've been rounding up some un-trieds and doubles from my stash, as we begin paring down the stuff in our house for the big move. Planning for an exciting giveaway! :)

Best wishes and thanks for stopping by!

♥
JQ